Red maples are known for their beautiful fall colored leaves and their ability to bring a unique touch to any space.
If you are passionate about bonsai and want to grow your own red maple from seed, this guide is for you. We will show you the essential steps to successfully stratify your Red Maple seeds, an essential technique to promote their germination. If you want to know why stratification works, you can read our article on the subject: Stratification and our Bonsai seeds .
1. Order the Bonsai Box Deluxe to receive Red Maple seeds
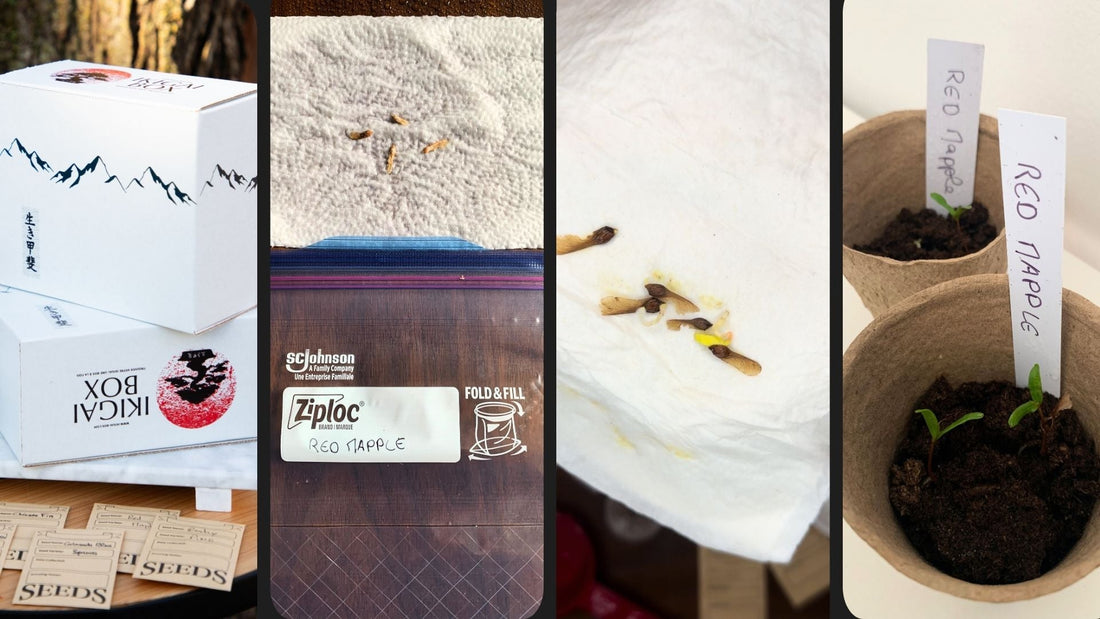
Before you begin the stratification process, you will need Red Maple seeds. The Ikigai Box Deluxe Bonsai Box is a great choice as it includes everything you need to grow 8 different types of bonsai trees, including Red Maple. This box contains high-quality seeds, bonsai soil, biodegradable pots, labels, and a complete instruction manual to help you get started. Once you receive your box, you are ready to get started.

2. Sprinkle water on the seeds on paper towels.
 What equipment do you need for lamination?
- Quality seeds
- A paper towel
- A spray/sprayer to moisten the seeds without flooding the paper towel.
- (Running) water
- A ziploc bag
To begin the stratification process, you must first moisten the seeds. Take a clean piece of paper towel and spread your Red Maple seeds on it. Using a spray bottle, lightly spray the seeds with water to hydrate them. This step is crucial because the moisture wakes up the seeds and signals them that it is time to begin the germination process.
3. Fold the paper towel to protect the moistened seeds and store it in a ziploc bag.
Once the seeds are moistened, gently fold the paper towel so that it completely covers the seeds. Then, place the folded paper towel in an airtight ziploc bag. This bag will create an ideal environment for the seeds by retaining moisture.

4. Put the ziploc in the refrigerator for 4 months
Cold stratification is a key step in germinating Red Maple seeds. Place the ziploc bag containing the seeds in the refrigerator for a period of 4 months . The cold temperature mimics the natural winter conditions that the seeds must go through before they can germinate. During this time, it is helpful to set a reminder in your calendar to check the condition of the seeds from time to time.
Here are the stratification tips for species in the Bonsai Box Deluxe :
|
Tree species |
Hydration |
Number of days required for stratification |
Temperature for stratification |
|
Rocky Pine |
24h |
No stratification period required |
No stratification period required |
|
Colorado Blue Spruce |
24h |
No stratification period required |
No stratification period required |
|
Tamarack larch |
12h |
2 weeks |
4°C (39°F) |
|
Lodgepole Pine |
24h |
1 month |
4°C (39°F) |
|
Chinese Fir |
24h |
1 month |
4°C (39°F) |
|
Eastern Juniper |
24h |
3 months |
4°C (39°F) |
|
Japanese Cedar |
24h |
3 months |
4°C (39°F) |
|
Red Maple |
24h |
4 months |
4°C (39°F) |
5. Take the ziploc out of the fridge after 4 months
After 4 months, remove the ziploc bag from the refrigerator. Open it gently and inspect the seeds. Some of them should start to germinate, with small white shoots visible. This is a sign that the seeds are ready to be planted.
6. Carefully remove the seeds from the paper towel.
Carefully remove the seeds from the paper towel.

If you don't see any germination yet , don't worry, your seeds may need more time: re-moisten the paper towel and put them back in the fridge for a period of one month. Check the temperature of your fridge. This gives the seeds another chance to germinate under the right conditions. Check again after a month to see if they have started to germinate.
7. Plant the seeds in the soil provided in the Bonsai Box
When the seeds start to germinate, it is time to plant them. Use the special soil provided in your Bonsai Box Deluxe to plant the seeds. Fill a small pot with the substrate, make a hole 1 to 2 cm deep, and place the germinated seeds in it. Cover gently with soil and water lightly to keep the soil moist.

8. Just one week later, you should see this wonderful result!
After planting your seeds, monitor them regularly. Make sure the soil remains moist, but not soggy. Typically, you will start to see the first shoots appear after about a week. This means that your Red Maple seeds have successfully germinated and are ready to grow into beautiful bonsai trees. Congratulations, you have successfully germinated your bonsai seeds!


